本記事ではMacターミナルでCiscoルーターへのTelnet設定・接続まで行った過程をナレッジとして記します。
Ciscoルーターの初期起動から基本設定までは以下の記事を参照ください。
- Ciscoルーターへコンソール接続するためのケーブリングから初期起動まで
- Ciscoルーターの基本設定|設定・確認コマンドから保存方法まで
- CiscoルーターへTelnet接続するまで ←現在
Ciscoルーターは全て1812Jを使っています。

PCはMacBookです。

以下にざっくりTelnet接続までの手順をまとめます。
- ルーターのインターフェースにIPアドレスを設定する
- IPを設定したルーターとパソコンのケーブリング
- パソコン側のIPアドレスの設定
- Telnet設定・準備
- Telnetクライアントをインストール
- コンフィグレーションファイルの保存
- Telnet接続
それではさっそく見ていきます。
ルーターのインターフェースにIPアドレスを設定する
Telnet接続するルーターのインターフェースに以下のコマンドでIPアドレスを設定します。
R-temlog#configure terminal
Enter configuration commands, one per line.  End with CNTL/Z.
R-temlog(config)#interface FastEthernet1
R-temlog(config-if)#ip address 192.168.20.1 255.255.255.0
次にインターフェースを以下コマンドで有効化します。
R-temlog(config-if)#no shutdown
R-temlog(config-if)#
R-temlog(config-if)#end
R-temlog#
インターフェースのリンク状況を確認します。
R-temlog#show ip interface brief
Interface                  IP-Address      OK? Method Status                Protocol
BRI0                       unassigned      YES NVRAM  administratively down down
BRI0:1                     unassigned      YES unset  administratively down down
BRI0:2                     unassigned      YES unset  administratively down down
FastEthernet0              unassigned      YES NVRAM  administratively down down
FastEthernet1              192.168.20.1    YES NVRAM  down                  down ←IPアドレスが設定されて、down downとなっているのでインターフェースが有効化になっています
FastEthernet2              unassigned      YES unset  up                    down
FastEthernet3              unassigned      YES unset  up                    down
FastEthernet4              unassigned      YES unset  up                    down
FastEthernet5              unassigned      YES unset  up                    down
FastEthernet6              unassigned      YES unset  up                    down
FastEthernet7              unassigned      YES unset  up                    down

R-temlog#
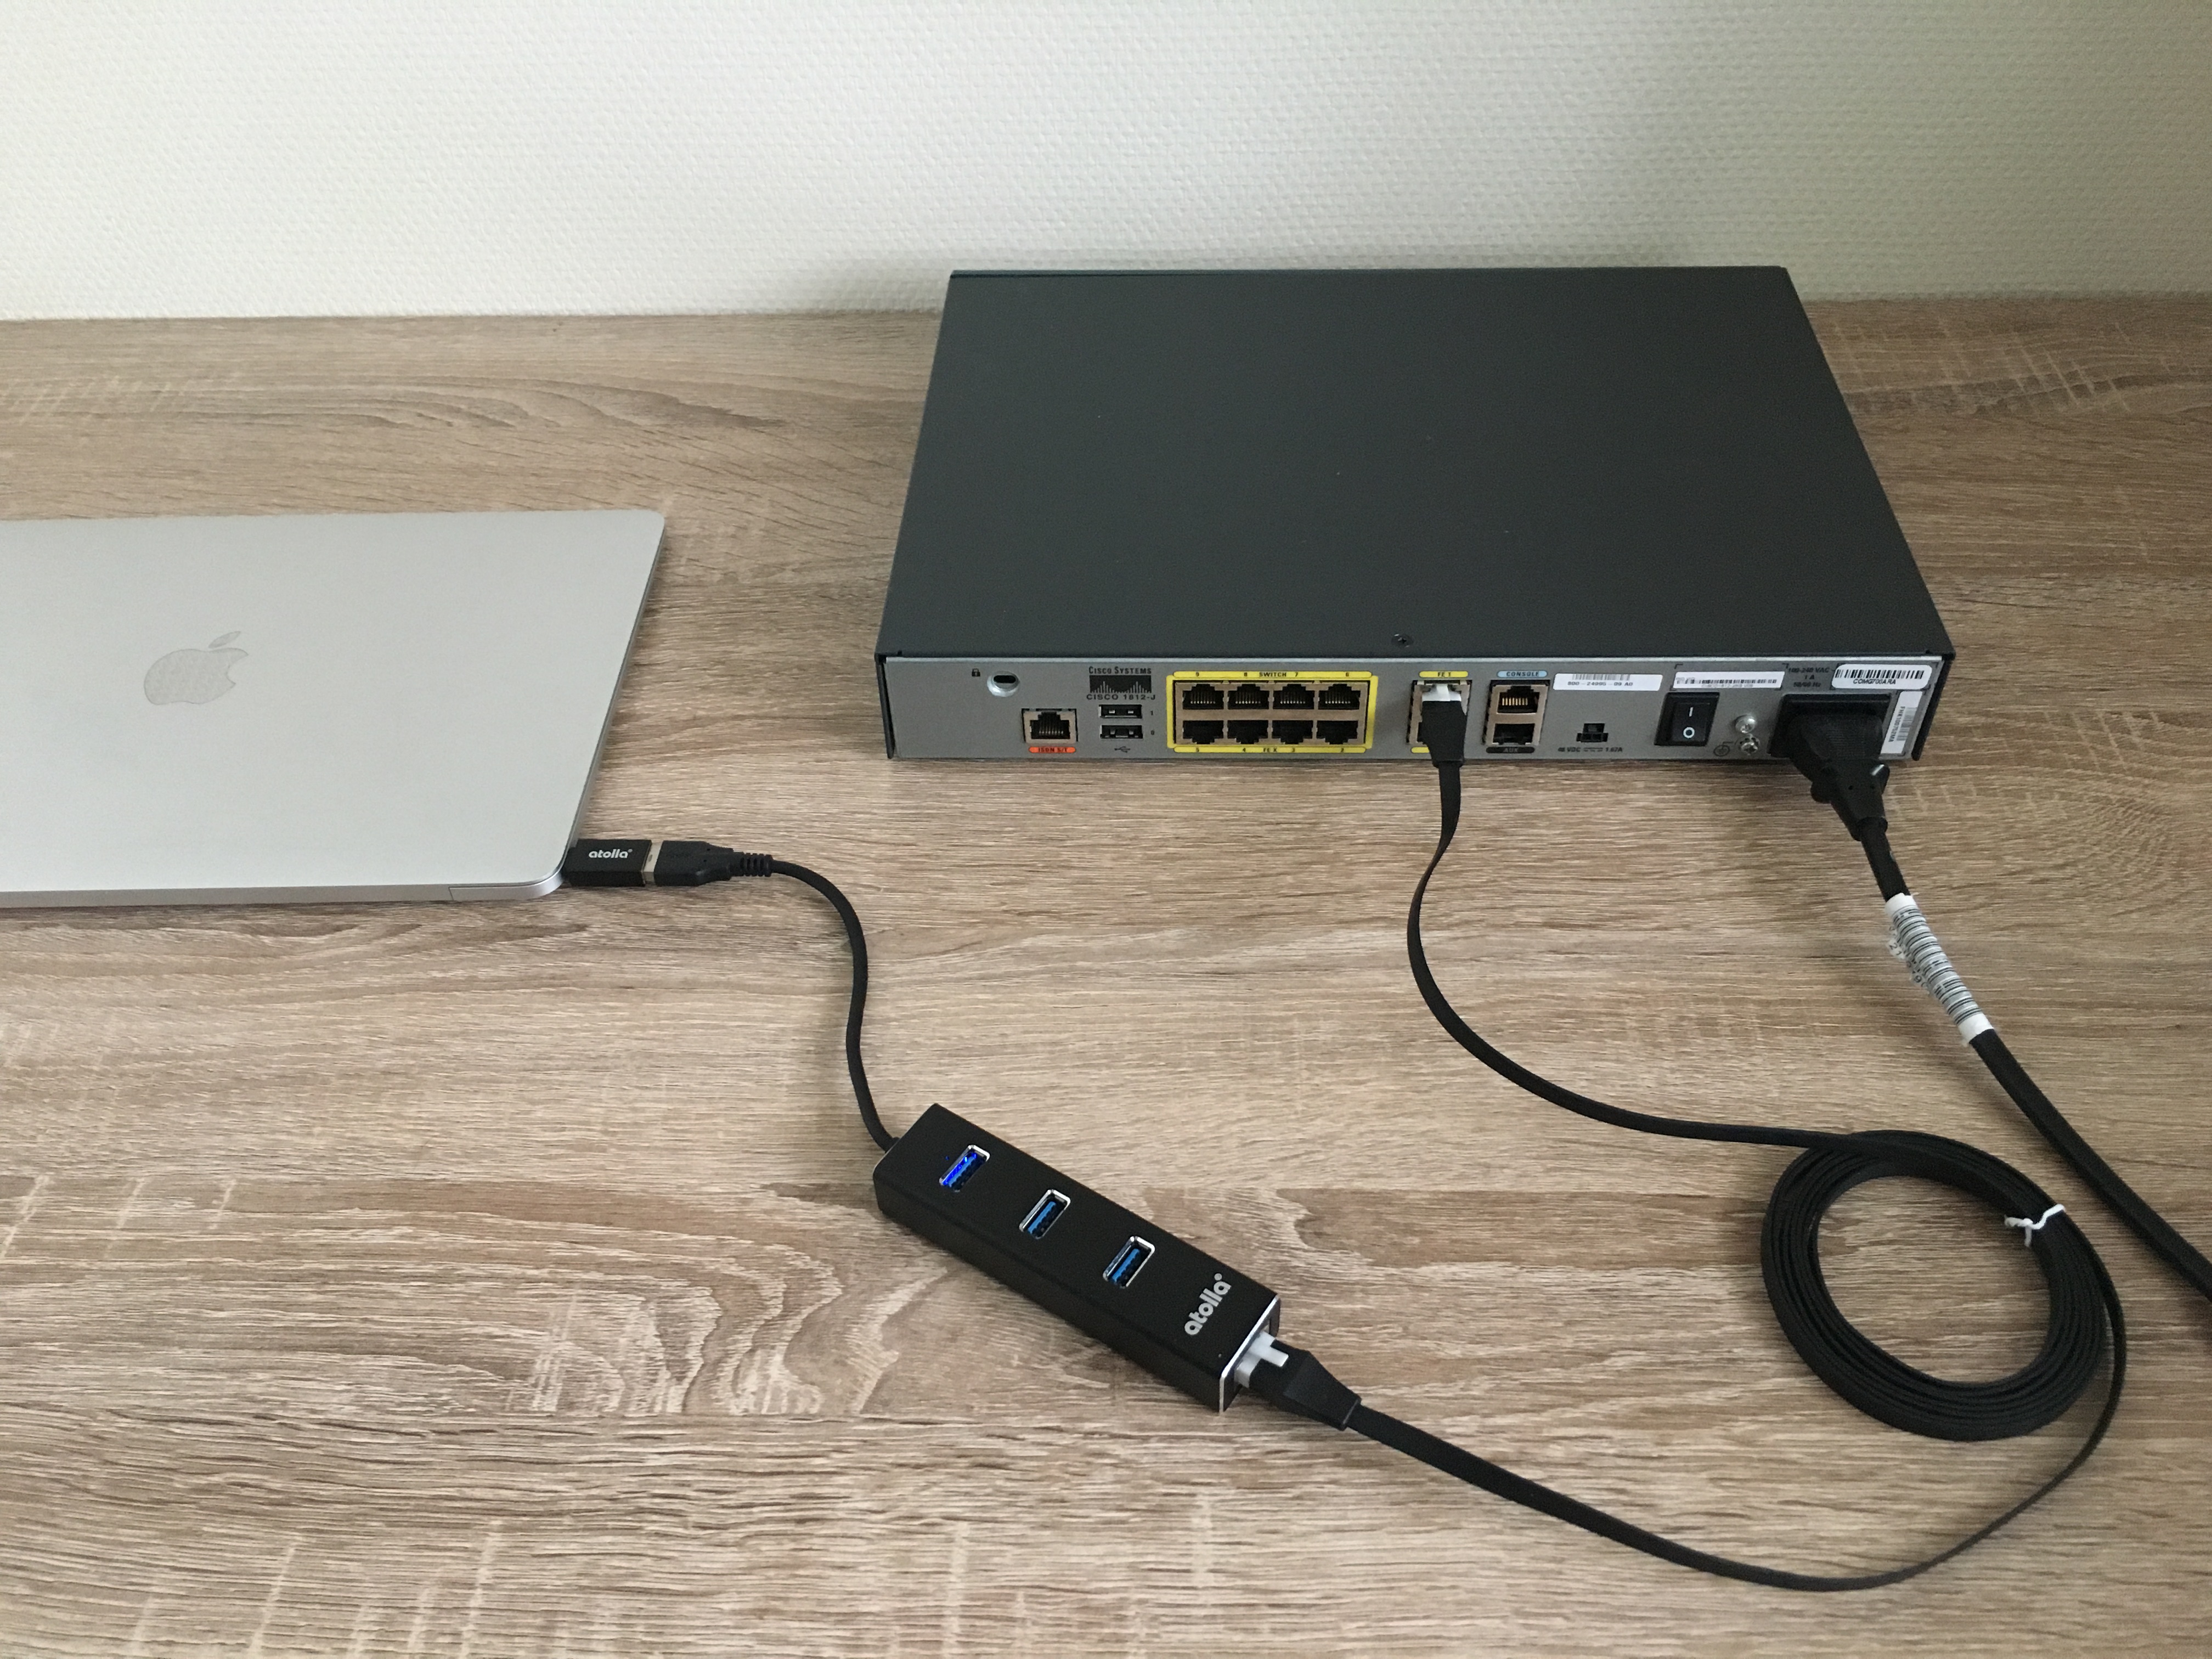
IPアドレスを設定したインターフェースにLANケーブルを接続する
IPアドレスを設定したルーターのインターフェースとパソコンをケーブリングします。
使うのはLANケーブルと


USBハブのLAN RJ45アダプターになります。
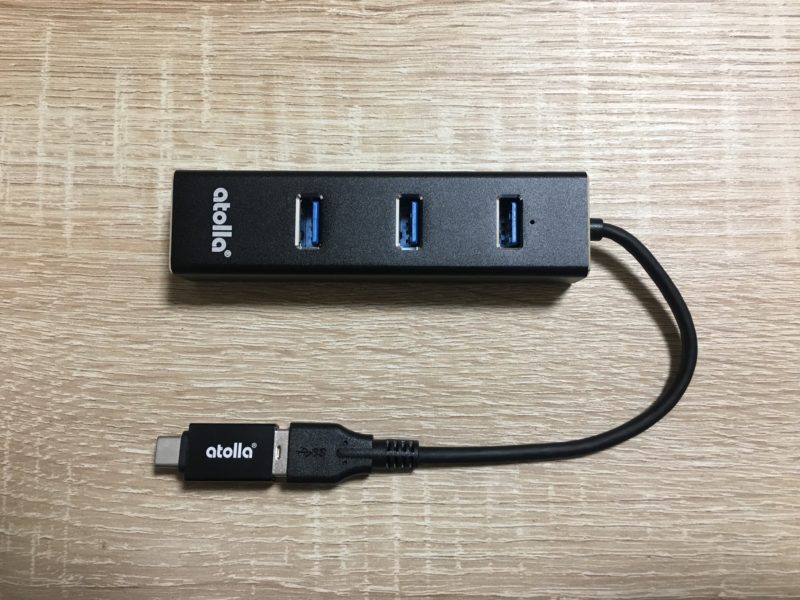

このアダプターはLAN RJ45ポートをUSB 3.0ポートへそしてUSB Type-Cポートへ変換します。
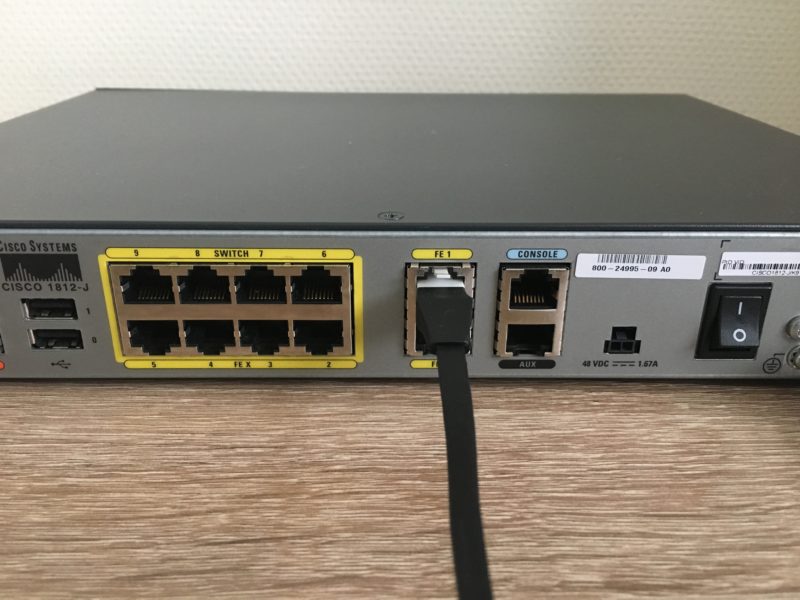
まずはルーター側はFE 1ポートにIPアドレスを設定しているので
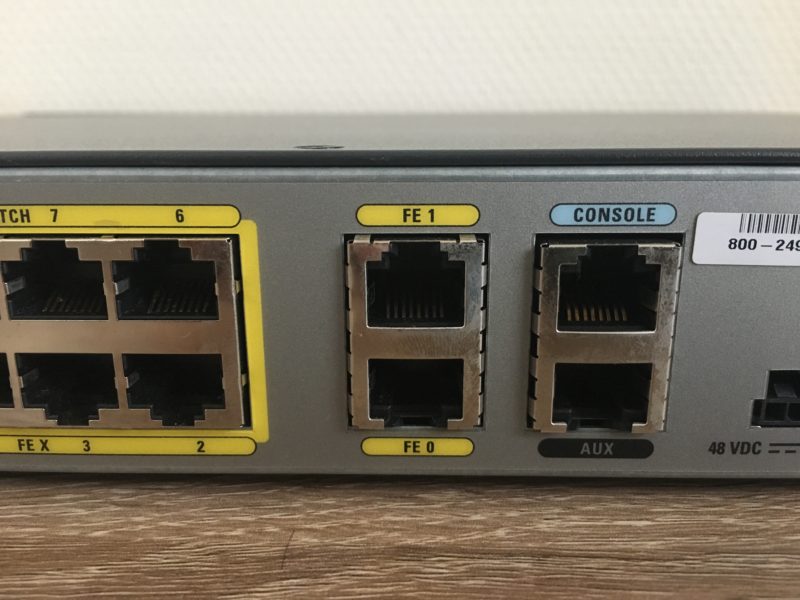
ここにLANケーブルさします。
パソコン側はUSB Type-Cポートにさします。
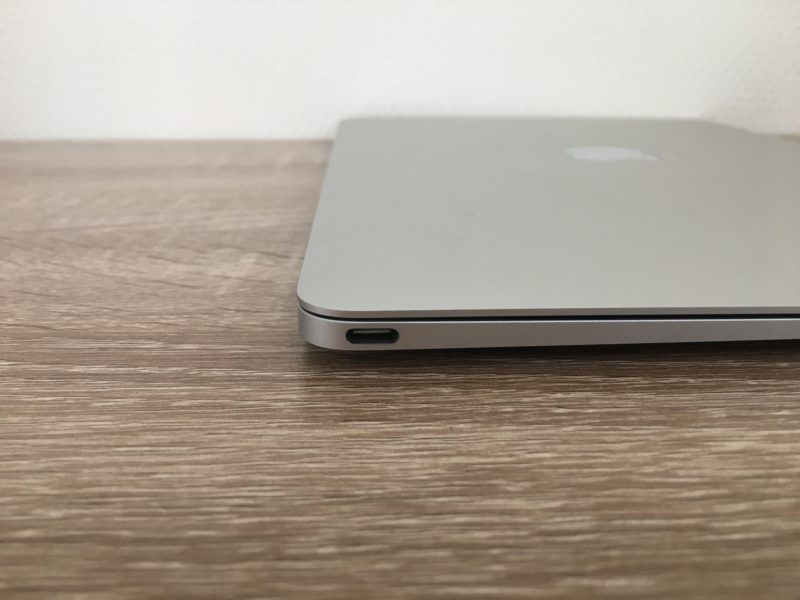
以下のようなケーブリングになります。

インターフェースのリンク状況を確認してみます。
R-temlog#show ip interface brief
Interface                  IP-Address      OK? Method Status                Protocol
BRI0                       unassigned      YES NVRAM  administratively down down
BRI0:1                     unassigned      YES unset  administratively down down
BRI0:2                     unassigned      YES unset  administratively down down
FastEthernet0              unassigned      YES NVRAM  administratively down down
FastEthernet1              192.168.20.1    YES NVRAM  up                    up ←up upとなっており、ケーブルが接続されている状態
FastEthernet2              unassigned      YES unset  up                    down
FastEthernet3              unassigned      YES unset  up                    down
FastEthernet4              unassigned      YES unset  up                    down
FastEthernet5              unassigned      YES unset  up                    down
FastEthernet6              unassigned      YES unset  up                    down
FastEthernet7              unassigned      YES unset  up                    down
FastEthernet8              unassigned      YES unset  up                    down

R-temlog#
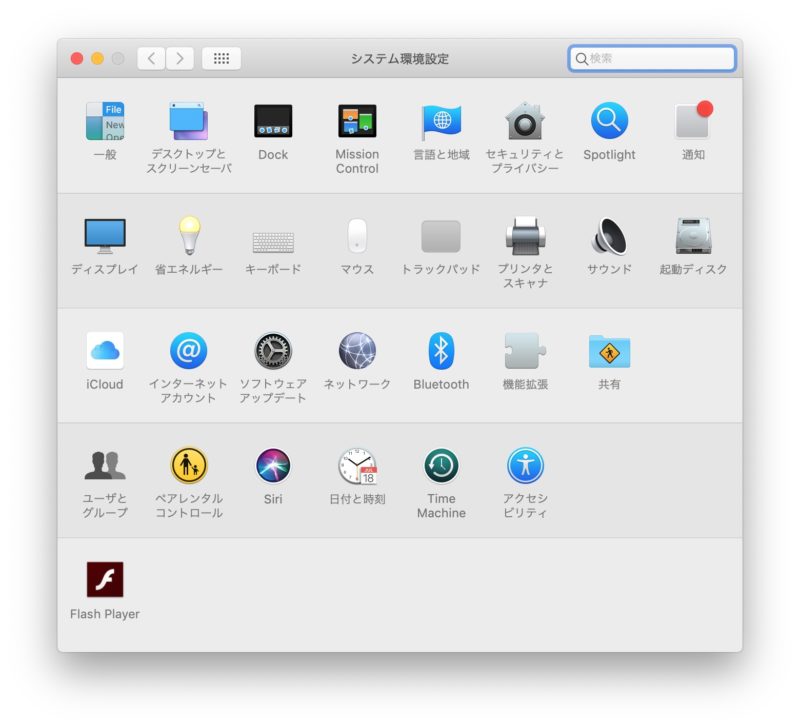
パソコンのIPアドレスを設定する
続いてパソコン側のIPアドレスを設定します。
システム環境設定からネットワークを開きます。
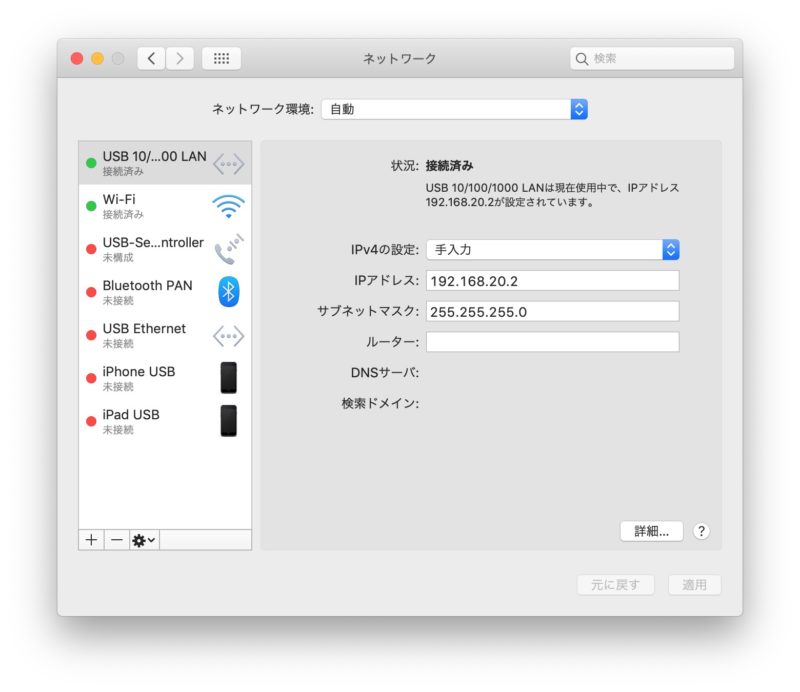
LANケーブルを接続したUSBを選択して、以下のようにIPアドレスを設定します。
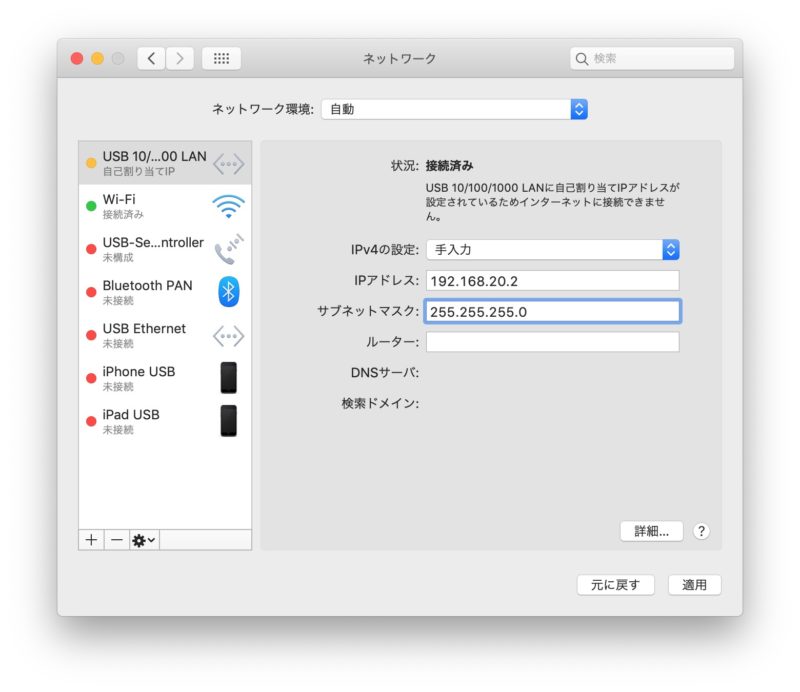
USBが接続済みになり、Ciscoルーターとパソコンのネットワークが繋がりました。
Telnetの設定・準備
CiscoルーターにTelnet接続するための設定・準備をしていきます。
まずは以下のようにTelnet設定します。
R-temlog#
R-temlog#configure terminal
Enter configuration commands, one per line.  End with CNTL/Z.
R-temlog(config)#line vty 0 4 ←VTYポート0から4までTelnet接続できるように設定
R-temlog(config-line)#password cisco4 ←Telnet接続時のパスワードを設定
R-temlog(config-line)#transport input telnet ←Telnetを許可します
R-temlog(config-line)#end
R-temlog#
show running-configコマンドでTelnet設定の確認します。
ちなみに以下の記事でコンフィグレーションファイルを暗号化する設定を行っているのでパスワードは暗号化されて表記されています。
参照;Ciscoルーターの基本設定|設定・確認コマンドから保存方法まで
R-temlog#show running-config
Building configuration...

Current configuration : 1379 bytes
!
! Last configuration change at 12:29:32 UTC Mon Aug 19 2019
version 15.1
service timestamps debug datetime msec
service timestamps log datetime msec
service password-encryption ←パスワードはコンフィグレーションファイルが暗号化されている設定です
!
hostname R-temlog
!
boot-start-marker
boot-end-marker
!
!
enable secret 5 $1$JbwL$uVU4zeCbkdSMBLhMCu1e/1
enable password 7 104D000A061840
!
no aaa new-model
!
crypto pki token default removal timeout 0
!
!
dot11 syslog
ip source-route
!
!
!
!
!
ip cef
no ipv6 cef
!
multilink bundle-name authenticated
!
!
!
license udi pid CISCO1812-J/K9 sn FHK100752MA
!
!
!
!
!
!
!
!
!
interface BRI0
 no ip address
 encapsulation hdlc
 shutdown
!
interface FastEthernet0
 no ip address
 shutdown
 duplex auto
 speed auto
!
interface FastEthernet1
 ip address 192.168.20.1 255.255.255.0
 duplex auto
 speed auto
!
interface FastEthernet2
 no ip address
!
interface FastEthernet3
 no ip address
!
interface FastEthernet4
 no ip address
!
interface FastEthernet5
 no ip address
!
interface FastEthernet6
 no ip address
!
interface FastEthernet7
 no ip address
!
interface FastEthernet8
 no ip address
!
interface FastEthernet9
 no ip address
!
interface Vlan1
 no ip address
!
ip forward-protocol nd
no ip http server
no ip http secure-server
!
!
!
!
!
!
!
!
!
control-plane
!
!
!
line con 0
 password 7 045802150C2E
 login
line aux 0
line vty 0 4
 password 7 110A1016141D5F ←パスワードは暗号化されている
 login
 transport input telnet ←Telnet接続が有効
!
end

R-temlog#
telnetクライアントをインストール
macOS High Sierra(10.13以降)にはtelnetクライアントがありません。
ですのでmacOS High Sierraに以下のものをインストールしてtelnetを使えるようにします。
- Homebrew
- Xcode
- Telnetコマンド
Homebrewをインストールする
以下のコマンドをコピペしてHomebrewインストールをします。
$ /usr/bin/ruby -e "$(curl -fsSL https://raw.githubusercontent.com/Homebrew/install/master/install)"
以下のようにRETURNキーのプッシュを求められ、さらにMacBooknのユーザーパスワードを求められます。
Press RETURN to continue or any other key to abort ←Enter
==> /usr/bin/sudo /bin/chmod u+rwx /usr/local/bin
Password: ←パスワードを入力
またさらにコマンドがだぁーっと流れます。
Xcodeのインストールもする
Homebrewのインストールが終わるとそのままXcodeのインストールも始まります。
以下のコマンドが出てきたらEnterを押してインストールを進めます。
Downloading Command Line Tools (macOS Mojave version 10.14) for Xcode
Downloaded Command Line Tools (macOS Mojave version 10.14) for Xcode
Installing Command Line Tools (macOS Mojave version 10.14) for Xcode ←Enter
Homebrewがインストールされているか確認します。
brew doctorとコマンドしてYour system is ready to brew.と出てくれば、インストールされています。
$ brew doctor
Your system is ready to brew.
Telnetコマンドをインストール
最後に以下コマンドでTelnetコマンドをインストールします。
$ brew install telnet
==> Downloading https://homebrew.bintray.com/bottles/telnet-60.mojave.bottle.tar
######################################################################## 100.0%
==> Pouring telnet-60.mojave.bottle.tar.gz
  /usr/local/Cellar/telnet/60: 4 files, 138.2KB
$
以上でTelnetが使えるようになります。
設定の保存
ここで以下コマンドでコンフィグレーションファイルを保存しましょう。
R-temlog#copy running-config startup-config
Destination filename [startup-config]?
Building configuration...
[OK]
R-temlog#
Telnet接続
ではいよいよTelnet接続していきます。
まずはコンソール接続からLogoutコマンドでログアウトします。
改めてターミナルから以下コマンドでTelnet接続してみてます。
$ telnet 192.168.20.1 ←Ciscoルーターに設定したIPアドレス
Trying 192.168.20.1...
Connected to 192.168.20.1.
Escape character is '^]'.


User Access Verification

Password: ←パスワードを入力
R-temlog> ←Telnets接続できました
繋がりましたでしょうか。意外とやることはそこまで多くないですね。
最後に
最後に確認でTelnet接続までの手順をまとめます。
- ルーターのインターフェースにIPアドレスを設定する
- IPを設定したルーターとパソコンのケーブリング
- パソコン側のIPアドレスの設定
- Telnet設定・準備
- Telnetクライアントをインストール
- コンフィグレーションファイルの保存
- Telnet接続
使用したもの
Ciscoルーターの初期起動から基本設定までは以下の記事を参照ください。
- Ciscoルーターへコンソール接続するためのケーブリングから初期起動まで
- Ciscoルーターの基本設定|設定・確認コマンドから保存方法まで
- CiscoルーターへTelnet接続するまで ←現在

コメント