
本ページではVirtualBoxとVagrantでCentOS7の仮想環境を構築した手順をナレッジとして記しております。
さらに構築したCentOS7へSSH接続でログインして、開発環境をスムーズに進める為に停止しておきたいサービスの設定まで行います。
また、LAMP環境の構築をこのページから順に以下を一読いただければ再現できますのでご参考ください。
- VirtualBoxとVagrantでCentOS7の仮想環境を構築してログインするまで ←今ここ
- CentOS7にApache httpdをインストールしてウェブサーバーを構築
- CentOS7にPHPをインストールしてinfoページの表示まで
- MariaDBとphpMyAdminインストール
本ページに出てくるコマンドはLpicレベル1の範囲で網羅できるレベルです。
Linuxの勉強にLpicの資格取得に便利なあずき本で勉強するとコマンドの理解度が進みます。

PCはMacBookです。

【環境】macOS Mojave 10.14.6
VirtualBoxのインストール
VirtualBoxをWindowsまたはMacにインストールしていきます。
まずは公式サイトからVirtualvoxをダウンロード。
exeファイルからインストーラーを起動してVirtualBoxをインストールします。
Vagrantのインストール
続いてVagrantを端末にインストールしていきます。
公式サイトからVagrantをダウンロード。
ダウンロードした msi インストールファイルを起動してインストールします。
Vagrantがインストールされているか確認しましょう。
【Macの場合】
ターミナルを起動します。

以下コマンド実行します。
~ $ vagrant -v
Vagrant 2.2.5 ←バージョンが表示され、インストールされていることを確認
CentOS7の仮想環境を構築
VirtualBoxとVagrantのインストールが完了したらさっそくCentOSの仮想環境を構築していきます。
まずはVagrantBoxという公開テンプレートいわゆるCentOSの雛形をダウンロードします。
以下コマンドを実行してCentOS7の仮想マシンテンプレートをダウンロード。
~ $ vagrant box add centos/7 ←入力コマンド
==> box: Loading metadata for box 'centos/7'
    box: URL: https://vagrantcloud.com/centos/7
This box can work with multiple providers! The providers that it
can work with are listed below. Please review the list and choose
the provider you will be working with.

1) hyperv
2) libvirt
3) virtualbox
4) vmware_desktop

Enter your choice:
今回はVirtualBoxなので3を入力してEnter
Enter your choice: 3 ←3としてEnter
==> box: Adding box 'centos/7' (v1905.1) for provider: virtualbox
    box: Downloading: https://vagrantcloud.com/centos/boxes/7/versions/1905.1/providers/virtualbox.box
    box: Download redirected to host: cloud.centos.org
==> box: Successfully added box 'centos/7' (v1905.1) for 'virtualbox'!
~ $
VagrantBoxを削除する場合は以下コマンドで実行できます。
~ $ vagrant box remove centos/7
以下コマンドで「centos7」というディレクトリを作成して、そのディレクトリへ移動します。
~ $ mkdir ~/centos7
~ $ cd ~/centos7
以下コマンドを実行して仮想マシンを初期化します。
centos7 $ vagrant init centos/7
A `Vagrantfile` has been placed in this directory. You are now
ready to `vagrant up` your first virtual environment! Please read
the comments in the Vagrantfile as well as documentation on
`vagrantup.com` for more information on using Vagrant.
centos7 $
以下コマンドを実行して、仮想マシンを起動します。
centos7 $ vagrant up
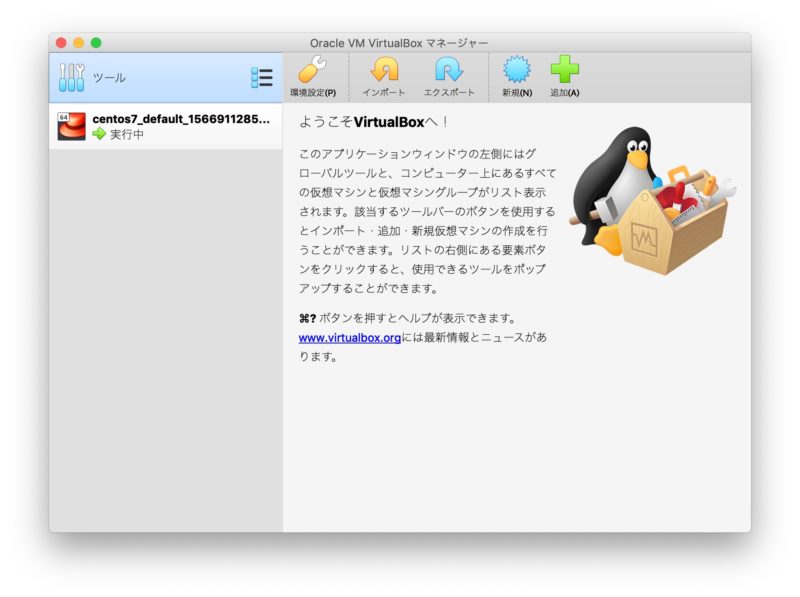
VagrantBoxマネージャーを開くと仮想マシンが起動していることを確認できます。
以下コマンドで仮想マシンの停止、スリープ、再起動、削除を実行できます。
仮想マシンを使わないときはセキュリティの観点からも停止しておくことがいいでしょう。
停止
centos7 $ vagrant halt
スリープ
centos7 $ vagrant suspend
再起動
centos7 $ vagrant reload
削除
centos7 $ vagrant destroy
仮想マシンへSSH接続でログインする
では仮想マシンにSSH接続していきます。
以下コマンドを実行します。
centos7 $ vagrant ssh
[vagrant@localhost ~]$ ←仮想マシンにSSH接続ができました
以下コマンドでrootユーザーへ移行できます。
[vagrant@localhost ~]$ su -
Password: ←パスワードは「vagrant」です
[root@localhost ~]#
以下コマンドで仮想マシンからログアウトできます。
[vagrant@localhost ~]$ exit
logout
Connection to 127.0.0.1 closed.
centos7 $ ←ターミナルのコンソールに戻りました
開発で不要なサービスを停止する
ソフトウェア開発では以下の機能を停止した方がスムーズに進むため必要であれば一旦停止しておきます。
FireWallの停止
FireWallを停止します。
以下でFireWallの状態を確認。
[vagrant@localhost ~]$ systemctl status firewalld
● firewalld.service - firewalld - dynamic firewall daemon
   Loaded: loaded (/usr/lib/systemd/system/firewalld.service; disabled; vendor preset: enabled)
   Active: inactive (dead) ←停止している状態
     Docs: man:firewalld(1)
[vagrant@localhost ~]$
Active: inactive(dead)になっていれば停止しています。
もしavtive(running)となっていればFireWallが起動しているので以下のコマンドで停止します。
[vagrant@localhost ~]$ sudo systemctl stop firewalld
FireWallの自動起動をOffにする。
[vagrant@localhost ~]$ sudo systemctl disable firewalld
[vagrant@localhost ~]$
以下コマンドでFireWallの自動起動をOffになっているか確認します。
[vagrant@localhost ~]$ systemctl is-enabled firewalld
disabled
[vagrant@localhost ~]$
SELinux機能の無効化
SE Linux機能を無効化します。
SELINUX=enforcing を
SELINUX=disabledに変更します。
ではさっそく以下のファイルを編集していきます。
[vagrant@localhost ~]$ sudo vi /etc/selinux/config


# This file controls the state of SELinux on the system.
# SELINUX= can take one of these three values:
#     enforcing - SELinux security policy is enforced.
#     permissive - SELinux prints warnings instead of enforcing.
#     disabled - No SELinux policy is loaded.
SELINUX=enforcing ←disabledに変更する
# SELINUXTYPE= can take one of three values:
#     targeted - Targeted processes are protected,
#     minimum - Modification of targeted policy. Only selected processes are protected.
#     mls - Multi Level Security protection.
SELINUXTYPE=targeted


~
サーバーを再起動する。
[vagrant@localhost ~]$ sudo reboot
Connection to 127.0.0.1 closed by remote host.
Connection to 127.0.0.1 closed.
centos7 $ vagrant ssh
Last login: Wed Aug 28 13:35:30 2019 from 10.0.2.2
[vagrant@localhost ~]$
SE Linux機能が無効化になっていることを確認します。
[vagrant@localhost ~]$ getenforce
Disabled
[vagrant@localhost ~]$
最後に
これにてCentOS7の仮想環境構築ができました。
Vagrantを使うと仮想マシンの構築があっという間にできますね。
引き続きLAMP環境の構築も以下記事に手順やコマンドをナレッジとして置いておりますので良かったらご覧ください。
- VirtualBoxとVagrantでCentOS7の仮想環境を構築してログインするまで←今ここ
- CentOS7にApache httpdをインストールしてウェブサーバーを構築
- CentOS7にPHPをインストールしてinfoページの表示まで
- MariaDBとphpMyAdminインストール
Linuxの構成やコマンドの理解にはあずき本を


コメント